Resource Management: Mind Your Mana, Part 1


Welcome back to Resource Management, my series examining the various resources available to you as a Magic player and how you can use them. Previously, we’ve looked at card advantage and life as a resource – today, we’re going to look at one of the least obvious and most crucial resources at your disposal: mana.
Step one in teaching a new player how Magic works is explaining the mana system. After all, we won’t get far without casting spells! Each turn, you get a land drop, which allow you to cast progressively more powerful spells – a five drop is generally going to be a lot more impactful than a two drop. We all take for granted that the mana system just works, and a lot of us don’t pay it much more mind. But mana, like any other, is a resource to be managed. To see what I mean, let’s dive in.
Mana Efficiency
Keeping with the above note that more expensive spells are generally more powerful, it makes sense that you want to use as much of your mana each turn as possible. For a lot of us, this is a pretty basic heuristic. Why is it a heuristic, though? If you know that it’s correct to play your most expensive card 95% of the time, in what situations should you deviate?
Playing on-curve
This is the 95% of the time. To demonstrate why this autopilot play is often correct, let’s take a look at an example from Ixalan limited.
You’re playing a low curve RW Dino deck, are on the play against a UB Pirates deck, and have gotten off to a good start. You played a Tilonalli’s Knight, into a Frenzied Raptor, and are now on turn four. Your opponent is on the defensive, and has cast a Dire Fleet Hoarder into a Sailor of Means, ready to make some blocks. Your hand is Brazen Buccaneers, two lands of both colours and Sure Strike. You draw Territorial Hammerskull.
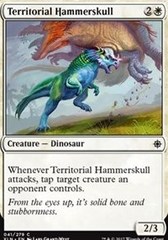
Now the Hammerskull definitely does more on this board. As it sits, your Buccaneers isn’t all that powerful as either a 2/2 or a 3/3, and the Hammerskull can allow you to push through a good chunk of damage next turn. But as you already have a two (Sure Strike), I’d generally recommend you cast your Buccaneers, explore, then pass the turn here. Next turn you are likely able to make an all-out attack and punish any blocks with your Sure Strike, then clean up the opponents’ remaining life with your Hammerskull. The key here is that you will have used all of your mana for the first five turns, which can be tough to beat!
Playing off-curve
So, playing on-curve is straight-forward – with some basic math, you can work out what combination of spells allow you to tap out every turn. However, there are times when you should go against the grain.
Let’s take another example from Ixalan limited with the same matchup. Your opponent was on the play, and curved that Direfleet Hoarder into a Deadeye Tormentor – you had a good start yourself, with a Tionalli’s Knight into a Territorial Hammerskull. Though the opponent burst right out of the gates with a two into a three drop, your Knight has been able to slam straight past the opposing Tormentor while your Hammerskull is bricking both of the opposing creatures. Things look good.
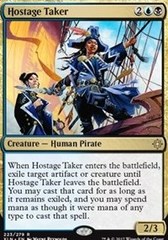
Your opponent untaps, plays their fourth land, and casts a Hostage Taker. Oh no! Your Hammerskull has been chained and leashed, and the Taker threatens to even cast it for themselves on your next turn. After taking a good smash for four damage, you untap, and are looking at a Thrash of Raptors, a couple of land and another Tionalli’s Knight. You draw Firecannon Blast for the turn.
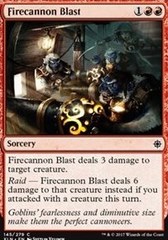
Now, if you’re playing on autopilot, you may want to utilise your mana as efficiently as possible here – you can cast Thrash this turn, and Knight plus Blast next turn. However, killing Taker this turn sets your Hammerskull free, where next turn it may have turned tail and joined the opponent!
While this is an obvious example, using only three of your four mana here is definitely preferable to allowing Taker to survive a turn. These situations can be much harder to determine, so you should always be on the lookout for the times you should ignore the first rule of mana efficiency.
Mana Shortage
Going back to the above example, let’s flip sides of the matchup – now you’re the UB deck against the RW deck.
You’re on the draw, and the opponent cast their Tionalli’s Knight on turn two. You played a Swamp on turn one, and now untap to see you’ve no two drops at the ready. However, you’ve got plenty more lands, a three drop, a four drop, and a five drop. Your turns three through five are already pretty well planned. You’re also holding a Walk the Plank.
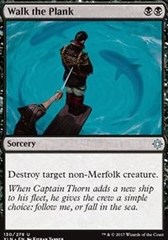
Given your opponent is RW, it’s safe to assume the non-Merfolk clause is going to be irrelevant – this means that Walk is premium removal, which you’d like to save for your opponents’ powerful four to six mana plays, like Thrash of Raptors or Sun-Crowned Hunters. Your opponent is RW, so you’re aware that a Hammerskull may come down next turn and stop you from blocking that Knight for the foreseeable future. Should you cast Walk?
While the opponents’ Knight is far from their most dangerous play, I would argue that yes, you should. As your mana will be taken up over the next few turns and you’re not going to be able to deal with the Knight, not casting it means committing to taking likely six or more damage. Looked at this way, how does ‘BB: destroy target creature and gain six life’ sound? Pretty good!
Mana Abundance
By contrast to the above example, let’s get back in the shoes of the UB deck, but this time pair against a slow and controlling UW deck. It’s game two, you’re on the play, and you have a good mix of lands and spells at the ready. You also have a Chart a Course. Turn two rolls around, and you don’t have a two mana play. Do you cast Chart?
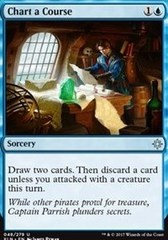
In this situation, I would say no, you’ll want to wait. If your hand was missing either lands or spells, this would be different, but as you’re already set up with both losing the ‘discard a card’ clause is more valuable than using your mana this turn. Even if you don’t wind up in a position to attack, recognising what you do and don’t need will likely be more important in a few turns, when you know if you’re digging for more action or your fifth/sixth land drop.
This logic can also apply to constructed. In Standard UB Control, if you pass turn three with Supreme Will at the ready against an empty board and your opponent doesn’t cast a spell, should you cast it to dig?

Again, this is situation dependant – is your hand missing a critical piece? Do you need lands, removal or card draw, as you’ve other counterspells? If so, then fire away, but if not, I’d argue you should wait. As you’re under no pressure, mana efficiency isn’t what’s important here – maximising the use of each of your cards is.
Mana Issues
Problems with mana are widely considered to be the worst aspect of Magic (and I don’t care what Mark Rosewater says, they are definitely ‘bugs’ and not ‘features’). There are enough sources of variance in the game in terms of drawing which cards in what order, without also adding the concern that you may draw too few or too many mana sources. That said, there are still ways to increase your percentage in games where you’ve found yourself on the receiving end of a bit of bad luck.
Mana Screw
We’ve all been there. You mulligan to six, keep a two lander, scry a nonland to the bottom, then proceed to miss a third land until turn seven. This is clearly unfortunate, and one of the ways many games of Magic end. However, the game isn’t over until it’s over, so what can you do?
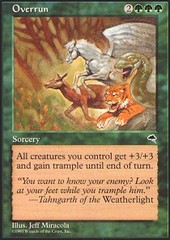
First, recognise that being mana screwed means you have entirely spells (up to seven when you pass the turn). This means that when you do draw land, you’re going to be casting spells every turn for the foreseeable future, and lots of spells are a good way to win games of Magic. Generally, do everything you can to stall out the game – don’t try and race, don’t get aggressive. If the game continues and your opponent is drawing a more standard mix of lands and spells, you are going to wind up playing more spells than the opponent and they are going to be overrun.
Secondly, your mana is tight, so make sure you’re using it as effectively as possible. If you have two red sources and one black available and a hand of black spells, don’t cast your red spell – cast black spells until the situation changes. You’re already behind by virtue of being short on lands; you don’t need to exacerbate this problem by casting a red spell, then being unable to play two black spells if you draw a red source next turn!
Now these are general rules – if you’re stuck on one land as Ramunap Red in Standard against UB Control, you should still be casting your one drops and definitely attacking – but they’re solid guidelines.
Mana Flood
Vice-versa, mana flood is when you just need action and can find only lands. It can be very frustrating! Still, there are things you can do to help yourself, and pretty much the binary opposite to the above.
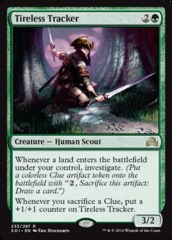
When you’re flooded, you are all lands and no spells. This means that the few spells you do have really need to pull their weight – you don’t want to be trading resources with the opponent, as if they have a good mix of spells and lands, you’ll find yourself with no spells left. Look for ways to get extra out of your cards – take some damage so you can engineer a two for one against your opponent, wait until you can get an immediate trigger from your Tireless Tracker the turn you cast it, and hold your removal until an absolute must-kill threat shows itself.
Next, be aware that mana is not a concern – you definitely do not need to be playing on curve if you’re not going to have a follow-up anyway! Hold the Walk the Plank for a better threat than that Tionalli’s Knight and take the early damage, as you can cast it on turn three just as easily as turn two.
Finally, be aware that flood is always a way you can lose. When you’ve got a good six drop in your hand but you’re not under pressure to cast it, five lands and a looting effect in play, loot away your extra lands! You’ll find one naturally eventually, and if you’re not drawing lands, you’re drawing extra spells to cast.
Summary
This week, we’ve looked at mana efficiency – how to sequence your spells, when to play on and off curve, and what to do when you’re light or heavy on mana sources. Next time, I’ll be taking a look at various methods to smooth your draws, mana sinks, and decks that prioritise getting ahead on mana.
As always, if you have any questions or ideas, please leave them in the comments below. Good luck!

