Rocking like a Robot
A few weeks back I wrote an article about my recent experiences with Affinity in modern and how I felt that Affinity should be built in order to gain the best results in a wide field such as a modern Grand Prix. Three weeks later, little has changed with the base list.
| Affinity | LANDS |
| 4 Blinkmoth Nexus | |
| CREATURES | 4 Inkmoth Nexus |
| 4 Ornithopter | 4 Darksteel Citadel |
| 2 Memnite | 4 Spire of Industry |
| 4 Signal Pest | 1 Mountain |
| 4 Vault Skirge | |
| 4 Steel Overseer | |
| 4 Arcbound Ravager | |
| 2 Etched Champion | |
| 2 Master of Etherium | |
| 1 Hangarback Walker | SIDEBOARD |
| 3 Thoughtseize | |
| ARTIFACTS | 1 Rest in Peace |
| 4 Cranial Plating | 1 Grafdigger’s Cage |
| 4 Springleaf Drum | 2 Dispatch |
| 4 Mox Opal | 2 Ancient Grudge |
| 2 Etched Champion | |
| INSTANTS AND SORCERIES | 2 Ghirapur Aether Grid |
| 4 Galvanic Blast | 2 Blood Moon |
After playing more matches versus various different graveyard based strategies, I’ve come to the conclusion that Relic of Progenitus isn’t where you want to be. Against Dredge for example, a single Ancient Grudge can win them the game and they are able to rebuild too quickly for the speedbump that Relic provides to be effective. Furthermore, decks such as Elves and Devoted Druid company decks can prove troublesome and having a one-hit KO card against them in Grafdigger’s Cage can single-handedly swing the game in your favour. For this reason, in the future I would opt for a 1/1 split between Cage and Rest in Peace. Otherwise, the deck list remains solid and is certainly a top contender for any upcoming modern tournaments at any level. If you put in the practice with a deck like Affinity, the rewards are endless.
In order to gain the experience you need however, it is vital that you are prepared when going into any given matchup. Therefore, the following is my guide to fighting the most significant matchups in the current modern format as well as a few of the best tips and tricks that are often missed yet pivotal to the goal of maintaining a consistently high win-rate with the deck.
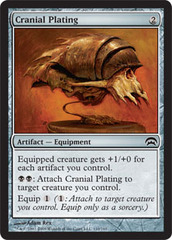
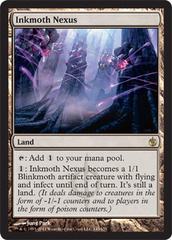
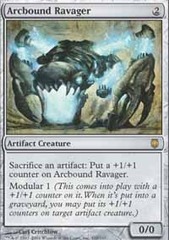
Cranial Plating, Arcbound Ravager and Nexuses are far and away the most difficult cards to use to maximum efficiency. Here are the most important things to keep in mind when playing with these cards.
- Know when to turn your Ravager into a 5 power Inkmoth Nexus and put the opponent on a two-turn clock.
- Be aware of the value of Cranial Plating’s BB instant speed attach activation to present lethal damage from multiple different threats.
- Remember that by sacrificing one Arcbound Ravager to another, rather than itself, you gain an extra counter to go onto any one of your artifact creatures.
- Remember that any single removal spell can result in your Ravager dying with one less counter than originally intended. Keep this in mind when trying to go for a lethal attack.
- Blinkmoth Nexus can give Nexuses +1/+1 until end of turn which can allow you to attack through 1/1 fliers or play around cards like Izzet Staticaster.
- Whenever you have an Inkmoth Nexus in play, check how much poison damage can be dealt (it’s often more than you’d expect!)
- When playing against cards such as Cryptic Command, there are often spots where you can pass priority in the beginning of combat phase, then after they are forced to tap your creatures to stay alive, you can activate your nexuses and get in for damage – and sometimes even make a lethal attack with Ravager or Plating.
- Even if you have already attacked, it is usually quite useful to use any wasted mana to re-equip Cranial Plating, either to prepare for next turn’s attacks or to create a high power blocker.
Outside of these cards, there are a few other rules of thumb that should be adhered to in the majority of situations.
- Play Mox Opal and Springleaf Drum before playing a 0 drop creature in order to play around a removal spell stopping the Drum from being activated or being able to interfere with metalcraft.
- You don’t need to announce Signal Pest triggers until they become relevant. This means that in hugely crowded boardstates, you may be able to sneak in an extra few points of unnoticed damage in order to turn the game around.
- Sometimes it is correct to activate Hangarback Walker in your main phase in order to play around cards like Lightning Bolt and Fatal Push.
- Remember that you can re-equip Cranial Plating post-combat in order to prepare for next turns attacks and blocks without being forced to waste mana.
- When you have two Mox Opals, you can use the second one as a ‘Lotus Petal’ effect you gain a temporary boost in mana.
Sideboarding
Affinity (Mirror)
In: 2 Ancient Grudge, 2 Ghirapur Aether Grid, 2 Dispatch
Out: 2 Etched Champion, 4 Signal Pest
Grixis Death’s Shadow
In: 2 Blood Moon, 2 Etched Champion, 1 Rest in Peace, 1 Dispatch
Out: 2 Master of Etherium, 2 Memnite, 2 Signal Pest, 1 Steel Overseer
G/x Tron
In: 3 Thoughtseize, 2 Blood Moon, 2 Dispatch
Out: 2 Etched Champion, 1 Hangarback Walker, 4 Galvanic Blast
Eldrazi Tron
In: 2 Dispatch, 2 Blood Moon,
Out: 2 Etched Champion, 1 Memnite, 1 Hangarback Walker
UR Storm
In: 2 Dispatch, 3 Thoughtseize, 1 Grafdigger’s Cage
Out: 2 Etched Champion, 4 Steel Overseer
RG Valakut
In: 3 Thoughtseize, 2 Blood Moon
Out: 2 Etched Champion, 2 Galvanic Blast, 1 Hangarback Walker
Burn
In: 2 Dispatch
Out: 1 Hangarback Walker, 1 Steel Overseer
Lantern Control
In: 3 Thoughtseize, 2 Ancient Grudge, 2 Ghirapur Aether Grid
Out: 2 Etched Champion, 1 Hangarback Walker, 2 Galvanic Blast, 2 Steel Overseer
BW Eldrazi Taxes
In: 2 Dispatch, 2 Ghirapur Aether Grid, 2 Thoughtseize
Out: 2 Etched Champion, 1 Hangarback Walker, 2 Memnite, 1 Signal Pest
UW Control
In: 3 Thoughtseize, 2 Blood Moon, 2 Ghirapur Aether Grid, 2 Etched Champion
Out: 2 Master of Etherium, 4 Galvanic Blast, 2 Signal Pest, 1 Memnite
Devoted Druid
In: 3 Thoughtseize, 2 Dispatch, 1 Ghirapur Aether Grid (Two on the play)
Out: 2 Etched Champion, 1 Hangarback Walker, 1 Memnite (2 on the play), 1 Signal Pest
Dredge
In: 2 Etched Champion, 1 Grafdigger’s Cage, 1 Rest in Peace
Out: 3 Signal Pest, 1 Hangarback Walker
Bear in mind his sideboard guide is just an outline and there is some merit to varying after seeing surprise sideboard cards in the second game. Also, it is worth noting that on the draw, you can often take out a land (Either Blinkmoth Nexus or Mountain) when you don’t significantly up your curve by adding in 3 drops or cutting 0 drops.
I hope this guide has been helpful, please post in the comments below with any thoughts or questions about Affinity or the article itself!


